How to Craft Traditional Greek Spanakopita
Are you ready to embark on a culinary journey to Greece right in your own kitchen? Let's dive into the art of crafting the traditional Greek Spanakopita, a mouthwatering pastry that combines the freshness of spinach with the richness of feta cheese, all encased in flaky phyllo dough. Get ready to impress your taste buds and your guests with this delightful dish that is sure to become a favorite.
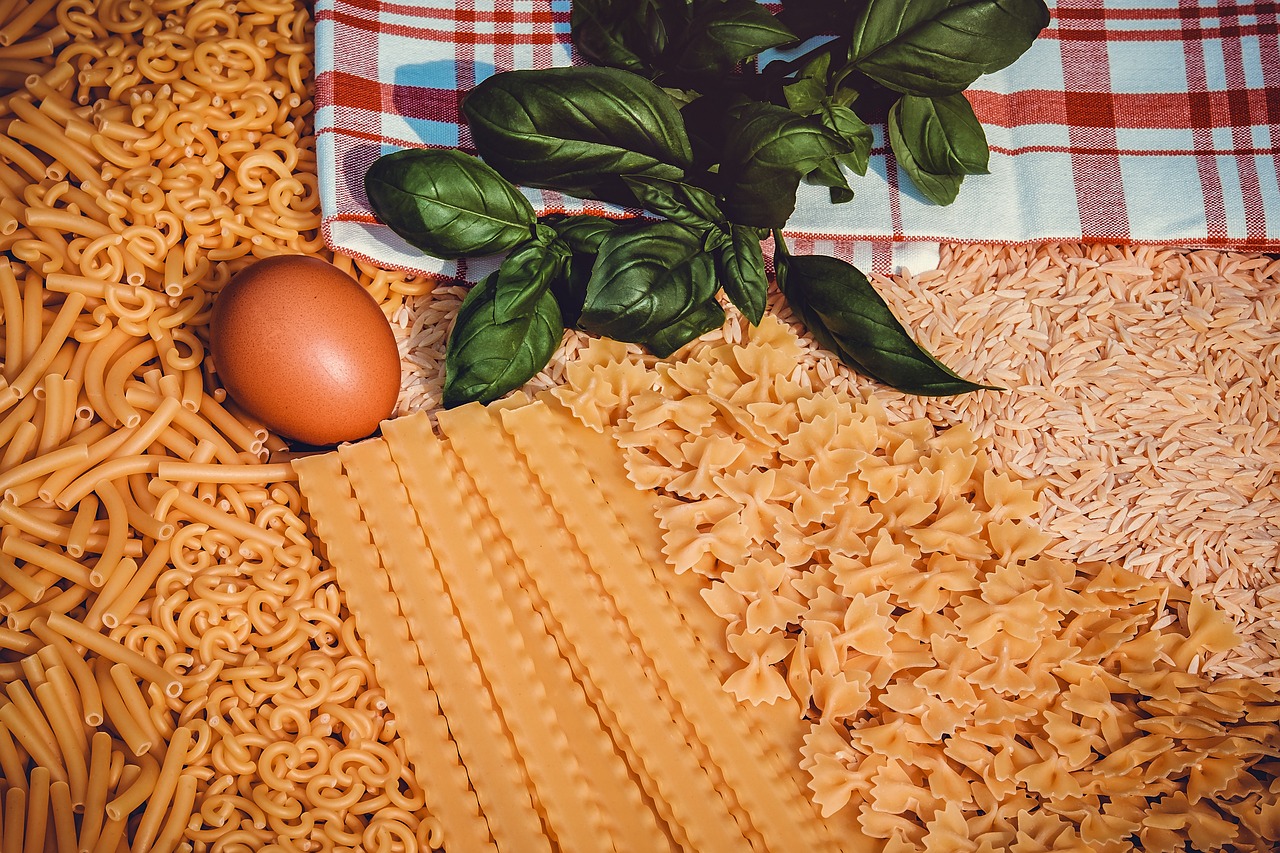
To start your Spanakopita adventure, you will need a handful of key ingredients and tools. Gather some fresh spinach, tangy feta cheese, delicate phyllo dough, aromatic onions, flavorful herbs, and of course, some quality olive oil. Additionally, make sure to have a mixing bowl for the filling, a pastry brush for layering the phyllo sheets, and a sharp knife for cutting the Spanakopita into delectable portions.
Now, let's delve into the heart of this savory delight - the filling. Begin by sautéing onions and garlic until they are fragrant and translucent. Mix them with wilted spinach, crumbled feta cheese, a medley of herbs, and a sprinkle of seasonings. Ensure that all the ingredients are well combined to create a harmonious and flavorful filling that will be the star of your Spanakopita.
Next comes the intricate process of layering the phyllo dough. Each delicate sheet needs to be brushed with olive oil to achieve that perfect flakiness. Carefully layer the oiled phyllo sheets in a baking dish, alternating with generous spoonfuls of the spinach-feta mixture. Repeat this process to create multiple layers, building up to a final masterpiece that promises a symphony of textures and flavors in every bite.
As you near the final steps of crafting your Spanakopita, it's time to create the iconic triangle shapes. Cut the layered phyllo and filling into squares, then fold them into neat triangles, reminiscent of little culinary parcels waiting to be unwrapped. Seal the edges with a brush of olive oil to ensure a crispy and golden finish once baked to perfection.
Once your Spanakopita triangles are assembled, it's time to let them shine in the oven. Bake them until they are gloriously golden brown and crispy, filling your kitchen with the tantalizing aroma of a Greek feast in the making. Allow them to cool slightly before serving, whether as an appetizer to tantalize the taste buds, a side dish to complement a meal, or even a main course that steals the spotlight.
For those adventurous souls looking to add a unique twist to their Spanakopita, consider experimenting with variations. Sprinkle in some pine nuts for a delightful crunch, add a touch of sweetness with raisins, or play around with different herb combinations to create your signature flavor profile. Remember to keep the phyllo dough moist by covering it with a damp towel as you work, ensuring that each layer remains tender and flaky.
As you savor each bite of your homemade Spanakopita, take a moment to appreciate the rich history and cultural significance behind this beloved Greek dish. Explore its origins, traditional preparation methods passed down through generations, and the role it plays in Greek celebrations and gatherings, where it brings people together around a table filled with love and good food.
Ingredients and Tools Needed
When preparing traditional Greek Spanakopita, it's essential to gather all the necessary ingredients and tools beforehand to ensure a smooth cooking process. To create this savory pastry filled with spinach and feta cheese, you will need a few key items in your kitchen.
Start by collecting fresh spinach, crumbled feta cheese, delicate phyllo dough, flavorful onions, aromatic herbs, high-quality olive oil, and a suitable baking dish. These ingredients form the foundation of a delicious Spanakopita that captures the essence of Greek cuisine.
In addition to the ingredients, you will also require a few tools to assist you in the preparation process. A mixing bowl is essential for combining the filling ingredients, while a pastry brush will help you layer the phyllo dough with olive oil for that perfect crispiness. Lastly, a sharp knife will come in handy when cutting the Spanakopita into individual portions before baking.
Preparing the Filling
When it comes to crafting traditional Greek Spanakopita, the filling plays a crucial role in delivering that authentic and delicious flavor. To begin preparing the filling, start by sautéing finely chopped onions and minced garlic in a drizzle of olive oil until they turn translucent and fragrant. This forms the flavorful base of the filling, adding depth to the overall taste of the Spanakopita.
Next, it's time to incorporate the star ingredients - spinach and feta cheese. Wilt the spinach in a pan until it reduces in volume, then combine it with crumbled feta cheese in a mixing bowl. The creamy and tangy feta complements the earthy spinach perfectly, creating a harmonious blend of flavors that will shine through in every bite of the Spanakopita.
To elevate the filling further, add a sprinkle of dried herbs such as dill or oregano, along with a pinch of salt and pepper for seasoning. These herbs not only enhance the taste but also contribute to the authentic Greek essence of the dish. Mix all the ingredients well to ensure an even distribution of flavors throughout the filling.
Once the filling is prepared, it's essential to taste and adjust the seasoning if needed. The balance of flavors is key to a successful Spanakopita, so don't hesitate to add more herbs or seasoning to suit your personal preference. Remember, the filling is the heart of the dish, so take your time to perfect it before moving on to the next steps of assembling the Spanakopita.
Layering the Phyllo Dough
Layering the phyllo dough is a crucial step in creating the perfect Spanakopita. The delicate and thin sheets of phyllo dough require gentle handling to achieve a flaky and crispy texture. To start, lay out a sheet of phyllo dough and brush it lightly with olive oil using a pastry brush. This helps to ensure that each layer bakes evenly and becomes golden brown.
After oiling the first sheet, carefully place another sheet on top and repeat the process. Alternate between layering the phyllo sheets and adding the spinach-feta mixture in between. The oil not only adds flavor but also helps the layers crisp up during baking, creating a delightful crunch with every bite.
Continue this process until you have used up all the phyllo dough and filling, finishing with a final layer of phyllo on top. Ensure that the top layer is also brushed with olive oil to promote even browning and a beautiful golden color. The multiple layers of phyllo dough and filling create a textural contrast that is both satisfying and delicious.
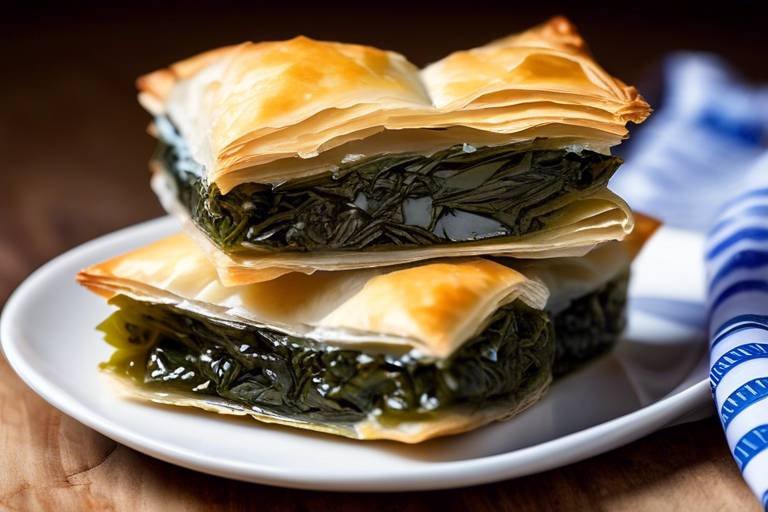
Creating the Spanakopita Triangles
When it comes to crafting traditional Greek Spanakopita, one of the key steps is creating the iconic Spanakopita triangles. These triangular pastries not only look beautiful but also hold a delightful combination of spinach and feta cheese within layers of flaky phyllo dough. To achieve the perfect Spanakopita triangles, follow these steps:
Start by cutting the layered phyllo and filling into squares of equal size. This ensures that each triangle will have a consistent amount of the delicious spinach-feta mixture inside. Using a sharp knife, carefully slice through the layers to create individual portions for shaping.
Once you have your squares ready, it's time to fold them into the classic triangle shape. Take a square of phyllo and filling, then fold one corner over to meet the opposite corner, creating a triangle. Press the edges gently to seal the filling inside, ensuring that the Spanakopita holds its shape while baking.
To secure the edges and add a touch of flavor, use a pastry brush to lightly coat the outer layer of the triangle with olive oil. This not only helps in sealing the pastry but also contributes to the golden and crispy finish that Spanakopita is known for.
After shaping your Spanakopita triangles, place them on a baking sheet lined with parchment paper. Make sure to leave some space between each triangle to allow for even baking and to prevent them from sticking together. Once arranged, the triangles are ready to be baked to perfection.
By mastering the art of creating Spanakopita triangles, you can elevate your culinary skills and impress your guests with these delicious and visually appealing pastries. Whether served as an appetizer, snack, or part of a meal, Spanakopita triangles are sure to be a hit at any gathering.

Baking and Serving
Once you have assembled and layered your Spanakopita, it's time to move on to the exciting part - baking and serving this delectable Greek dish. The oven will work its magic on the phyllo dough, transforming it into a golden, crispy shell that encases the flavorful filling inside. As the Spanakopita bakes, your kitchen will be filled with the irresistible aroma of herbs, spinach, and feta cheese melding together.
To achieve the perfect texture and taste, bake the Spanakopita until it reaches a beautiful golden brown color. This ensures that the phyllo dough is fully cooked and crispy, providing a satisfying crunch with every bite. Keep an eye on the oven to prevent over-browning, as the delicate layers of dough can quickly go from golden to burnt.
Once your Spanakopita is ready, allow it to cool slightly before serving. This brief resting period allows the flavors to meld together and the layers to set, ensuring that each bite is a harmonious blend of textures and tastes. Whether you choose to serve it as an appetizer, side dish, or main course, your guests are in for a treat with this traditional Greek dish.
To elevate the presentation of your Spanakopita, consider garnishing it with a sprinkle of fresh herbs or a drizzle of olive oil before serving. These final touches not only add visual appeal but also enhance the overall flavor profile of the dish, making it even more enticing to your diners.

Variations and Tips
When it comes to crafting traditional Greek Spanakopita, there are various ways to add your own twist to this classic dish. One popular variation is to include pine nuts in the filling, adding a crunchy texture and nutty flavor to each bite. Additionally, you can experiment with incorporating raisins for a touch of sweetness that complements the savory spinach and feta cheese.
To enhance the flavor profile of your Spanakopita, consider using a blend of different herbs such as dill, parsley, and mint. These herbs not only add depth to the filling but also bring out the freshness of the spinach and richness of the feta cheese. Feel free to adjust the herb quantities based on your personal preference to create a custom flavor profile.
For those looking to explore more creative options, you can play around with the shape of your Spanakopita. Instead of the traditional triangular pastries, try forming them into small parcels or even a large pie for a unique presentation. The key is to ensure that the phyllo dough is well-sealed to prevent the filling from spilling out during baking.
When working with phyllo dough, it's essential to keep it moist to prevent it from drying out and becoming brittle. Cover the sheets with a damp towel while assembling the Spanakopita to maintain their pliability and ensure a smooth texture in the final dish. This simple tip can make a significant difference in the overall quality of your Spanakopita.
Lastly, don't be afraid to get creative in the kitchen and tailor the Spanakopita to your taste preferences. Whether you prefer a more traditional approach or want to experiment with bold flavors, the versatility of this dish allows for endless possibilities. Enjoy the process of crafting your Spanakopita and savor the delicious results with each flavorful bite.
Storing and Reheating
When it comes to storing and reheating your delicious homemade Spanakopita, there are a few key tips to keep in mind. To maintain the pastry's crispiness and flavors, it is essential to store it properly and reheat it with care.
After enjoying your Spanakopita, any leftovers should be stored in an airtight container in the refrigerator. This will help preserve its freshness and prevent it from drying out. Spanakopita can typically be stored this way for up to three days without compromising its taste.
When it's time to reheat your Spanakopita, the oven is your best friend. Preheat the oven to a moderate temperature and place the pastry on a baking sheet. Heating it in the oven will help maintain its flaky texture and ensure that it remains crispy.
If you're in a hurry, you can use a microwave to reheat individual portions of Spanakopita. However, be aware that this method may result in a slightly softer texture compared to using the oven. To avoid sogginess, consider using a combination of microwave and oven heating for the best results.
Remember, Spanakopita is best enjoyed fresh and hot, so try to reheat only the amount you plan to consume to retain its delightful flavors and textures. With these simple storing and reheating tips, you can savor the taste of traditional Greek Spanakopita anytime you desire.

History and Cultural Significance
Spanakopita, a traditional Greek dish, holds a significant place in the country's culinary history and culture. This savory pastry, filled with a delightful blend of spinach and feta cheese, has been enjoyed for generations in Greece and beyond. Its origins can be traced back to ancient times, where it was a popular dish among the Greeks. Spanakopita is not just a food item; it represents a connection to Greek traditions and family gatherings.
The preparation of Spanakopita is considered an art form, with each step reflecting the care and dedication put into creating this delicious dish. The layers of phyllo dough symbolize the layers of history and culture that have shaped Greek cuisine over the centuries. The filling, a harmonious mix of spinach, feta cheese, and aromatic herbs, captures the essence of Mediterranean flavors.
When Spanakopita is served at Greek celebrations and gatherings, it becomes more than just a meal—it becomes a symbol of togetherness and shared heritage. The act of making Spanakopita is often a communal effort, with family members coming together to prepare and enjoy this beloved dish. It is a way of preserving traditions and passing down recipes from one generation to the next.
Spanakopita's cultural significance extends beyond its taste; it embodies the spirit of Greek hospitality and warmth. The dish is often shared with guests as a gesture of friendship and welcome. In Greek households, serving Spanakopita is a way of showing love and care for those gathered around the table.
As you delve into the world of Spanakopita, you not only savor its delicious flavors but also immerse yourself in the rich tapestry of Greek history and culture. Each bite is a journey through time, connecting you to the traditions and stories that have been passed down through the ages.
Frequently Asked Questions
- What is Spanakopita?
Spanakopita is a traditional Greek dish consisting of a savory pastry filled with a mixture of spinach, feta cheese, onions, herbs, and seasonings, all wrapped in layers of flaky phyllo dough.
- Can I make Spanakopita ahead of time?
Absolutely! Spanakopita can be prepared in advance and stored in the refrigerator for up to three days. Simply reheat it in the oven to restore its crispiness and flavors before serving.
- What variations can I try with Spanakopita?
There are endless possibilities for customizing your Spanakopita. You can experiment with adding ingredients like pine nuts, raisins, or different herbs to the filling to create unique flavor profiles.
- Is Spanakopita suitable for vegetarians?
Yes, Spanakopita is a vegetarian dish as it does not contain any meat. The filling is primarily made with spinach, feta cheese, and herbs, making it a delicious and satisfying option for vegetarians.
- What is the cultural significance of Spanakopita?
Spanakopita holds a special place in Greek cuisine and culture. It is often served during celebrations and gatherings, symbolizing warmth, hospitality, and the joy of sharing delicious food with loved ones.